I love where I work.
(And I will explain what the above shot of cake has to do with that in just a second - don't be alarmed.)
I know how lucky I am to be able to say that; so many people don't. (And I haven't in the past.) Part of it is just that I love my actual job, I'm good at it, and it's a good environment to work in. But mostly, it's the people. There are some great people who work there, and who make it a pleasure to go in every day. Fortunately for me, some of those people have become true friends - in and out of the office.
Those friends are what I call "The Cake People." These are the people who are so high up on my list that I would put myself through the ninth Circle of Hades - i.e., bake a birthday cake - for them.
See, baking a birthday cake to bring to the office is a royal pain in the ass. First, there's remembering their birthday (no mean feat - ask my mom, who gets birthday wishes every March 3rd, then reminds me that her birthday is May 3rd.), then remembering to borrow the cake taker. Then there's the shopping. Then, I bake the layers the night before, wrap them and place them aside to cool. Then, I get up at 5am the day the cake is due, make the frosting, fill and decorate the cake.
Then I pack it up in my borrowed cake taker (why don't I have one of these, Bueller?), and schlep it all the way into the city on the bus. THEN, I get to walk ten minutes from my bus stop to the office, past about 100 people who think they're uniquely funny when they say "Can I help you with that?!"
I really, really have to like you to bake you a birthday cake.
Well, one of my friends at work is someone I really, really like apparently: I call him The Russian. Even though he's Ukrainian. And over the past few months of patient translation of Russian movie trailers and shared soccer fervor, The Russian has clawed his way to Cake Person status.
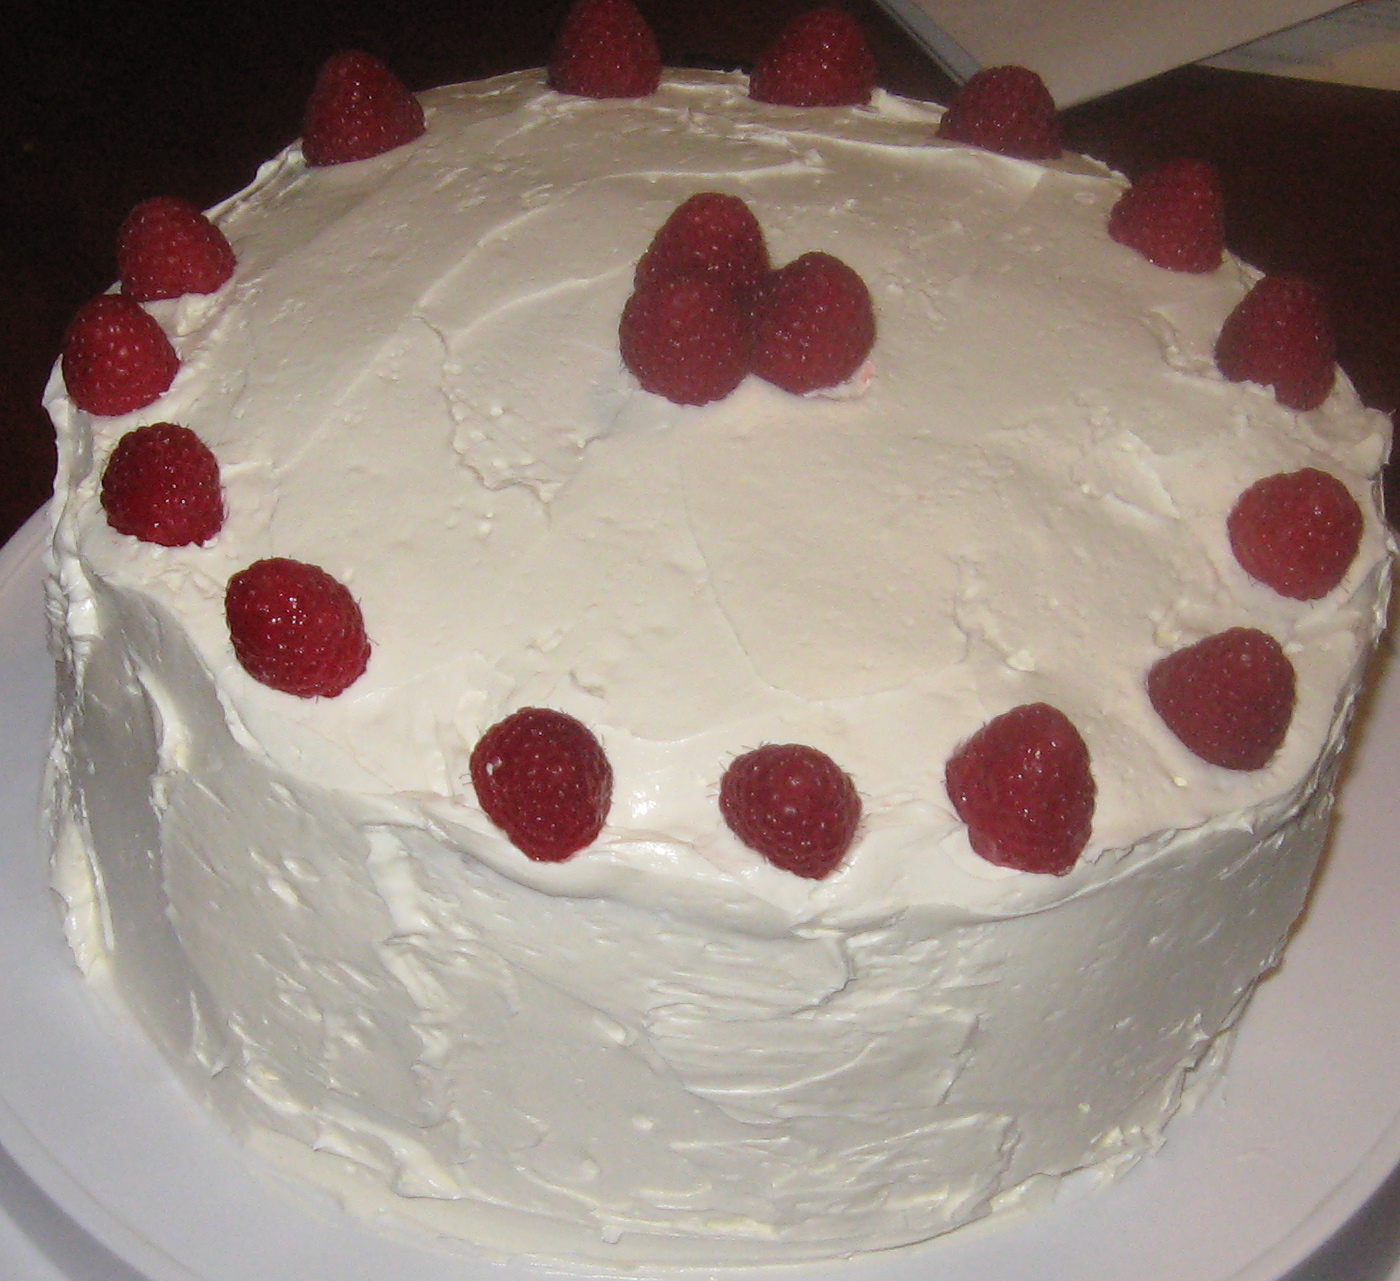
Behold, The Russian's birthday cake:

The Russian is apparently broken and doesn't like chocolate (didn't realize those people existed), so he requested something with fruit, preferably raspberry. Therefore, I made him Dorie Greenspan's Perfect Party Cake: a buttermilk cake scented with lemon sugar, and frosted with a lemon-flavored Swiss meringue buttercream frosting. Inside, I brushed the layers with raspberry jam before filling them with the buttercream, then added a ring of raspberries to the top.

It went over a storm, and The Russian seemed genuinely happy with his cake. He kept it in his cube until the whole row smelled like lemon, and growled at anyone who got too close. In the end, he did share it, and we all pretty much made ourselves sick on it. One girl declared she "doesn't like cake" - and proceeded to have two slices.

See the hand in this picture? That belongs to a guy in the office who was slowly working his way into the rarified Cake Person stratosphere. Then, while devouring my masterpiece, he pointed out that he didn't actually have to make me like him enough to become a Cake Person. He just had to make friends with the
other Cake People, and then he'd get
their cake.
Guess who is never going to become a Cake Person?
Anyway, here's the recipe:
Perfect Party Cake
For the Cake
2 ¼ cups cake flour
1 tablespoon baking powder
½ teaspoon salt
1 ¼ cups whole milk or buttermilk (I prefer buttermilk with the lemon)
4 large egg whites
1 ½ cups sugar
2 teaspoons grated lemon zest
1 stick (8 tablespoons) unsalted butter, at room temperature
½ teaspoon pure lemon extract
For the Buttercream
1 cup sugar
4 large egg wites
3 sticks (12 ounces) unsalted butter, at room temperature
¼ cup fresh lemon juice (from 2 large lemons)
1 teaspoon pure vanilla extract
For Finishing
2/3 cup seedless raspberry preserves, stirred vigorously or warmed gently until spreadable
About 1 ½ cups sweetened shredded coconut
Getting Ready: Center a rack in the oven and preheat the oven to 350 degrees F. Butter two 9-x-2 inch round cake pans and line the bottom of each with a round of buttered parchment or wax paper. Put the pans on a baking sheet.
To Make the Cake: Sift together the flour, baking powder and salt.
Whisk together the milk and egg whites in a medium bowl.
Put the sugar and lemon zest in a mixer bowl or another large bowl and rub them together with your fingers until the sugar is moist and fragrant. Add the butter, and working with the paddle or whisk attachment, or with a hand mixer, beat at medium speed for a full 3 minutes, until the butter and sugar are very light. Beat in the extract, then add one third of the flour mixture, still beating on medium speed. Beat in half of the milk-egg mixture, then beat in half of the remaining dry ingredients until incorporated. Add the rest of the milk and eggs, beating until the batter is homogeneous, then add the last of the dry ingredients. Finally, give the batter a good 2-minute beating to ensure that it is thoroughly mixed and will aerated. Divide the batter between the two pans and smooth the tops with a rubber spatula.
Bake for 30 to 35 minutes, or until the cakes are well risen and springy to the touch- a thin knife inserted into the centers should come out clean. Transfer the cakes to cooling racks and cool for about 5 minutes, then run a knife around the sides of the cakes, unmold them and peel off the paper liners. Invert and cool to room temperature right side up. (The cooled cake layers can be wrapped airtight and stored at room temperature overnight or frozen for up to 2 months.)
To Make the Buttercream: Put the sugar and egg whites in a mixer bowl or other large heatproof bowl, fit the bowl over a pan of simmering water and whisk constantly, keeping the mixture over the heat, until it feels hot to the touch, about 3 minutes. The sugar should be dissolved, and the mixture will look like shiny marshmallow cream. Remove the bowl from the heat.
Working with the whisk attachment or with a hand mixer, beat the meringue on medium speed until it is cool, about 5 minutes. Switch to the paddle attachment if you have one, and add the butter a stick at a time, beating until smooth. Once all the butter is in, beat the buttercream on medium-high speed until it is thick and very smooth, 6 to 10 minutes. During this time, the buttercream may curdle or separate-just keep beating and it will come together again. On medium speed, gradually beat in the lemon juice, waiting until each addition is absorbed before adding more, and then the vanilla. You should have a shiny, smooth, velvety, pristine white buttercream. Press a piece of plastic against the surface of the buttercream and set aside briefly.
To Assemble the Cake: Using a sharp serrated knife and a gentle sawing motion, slice each layer horizontally in half. Put one layer cut side up on a cardboard cake round or a cake plate protected by strips of wax or parchment paper. Spread it with one third of the preserves. Cover the jam evenly with about one quarter of the buttercream. Top with another layer, spread with preserves and buttercream and then do the same with a third layer (you’ll have used all the jam and have buttercream left over). Place the last layer cut side down on top of the cake and use the remaining buttercream to frost the sides and top. Press the coconut into the frosting, patting it gently all over the sides and top.
Makes 12 to 14 servings
 I make my turkey gravy ahead of time, which saves a whole lot of stress on Thanksgiving morning. A lot of people marvel at that, but it's actually pretty easy. I roast some turkey necks and parts I buy frozen with some basic vegetables (carrots, celery, onions, etc.). Then, I combine them with water and white wine and cook that down into a stock. I then use the stock as a base for the gravy. It's time-consuming, but again, worth it not to have to stand over a hot stove at the last minute, frantically stirring a roux.
 I use the Pioneer Woman's recipe. And yes, I still buy the stuff in the can, because some people just have to have it. But this stuff is amazing. Plus, it looks pretty packed in a Mason jar and set on the table.
 I don't really do pies (never been too good at it), and with a great bakery just down the street, why would I? I let them handle dessert, and my stress levels go down accordingly. However, good as their pumpkin pie is, it's even better with a scoop of homemade vanilla ice cream. And since I can do it ahead of time, it's easy to add to the menu.
 I use the Pioneer Woman's recipe. And yes, I still buy the stuff in the can, because some people just have to have it. But this stuff is amazing. Plus, it looks pretty packed in a Mason jar and set on the table.
 I don't really do pies (never been too good at it), and with a great bakery just down the street, why would I? I let them handle dessert, and my stress levels go down accordingly. However, good as their pumpkin pie is, it's even better with a scoop of homemade vanilla ice cream. And since I can do it ahead of time, it's easy to add to the menu.
 I brine my turkey, which makes it really moist and flavorful. I've heard brining is becoming passe, and everyone salts their turkeys now. Whatever. To me, nothing gets the kind of flavor into the meat the way brine does. I used to make my own solution, but I fell in love with Williams-Sonoma's last year. You add apple cider to the mix while the turkey brines, and then stuff the turkey cavity with apples. Heaven.
 I brine my turkey, which makes it really moist and flavorful. I've heard brining is becoming passe, and everyone salts their turkeys now. Whatever. To me, nothing gets the kind of flavor into the meat the way brine does. I used to make my own solution, but I fell in love with Williams-Sonoma's last year. You add apple cider to the mix while the turkey brines, and then stuff the turkey cavity with apples. Heaven.